Looking to add a personal touch to your home decor? Why not try your hand at making your own curtains! In this step-by-step tutorial, we will guide you through the process of creating custom curtains that perfectly suit your style and space. No sewing experience required - just a bit of creativity and a willingness to dive into a fun DIY project. Let’s get started!

Selecting the Right Fabric and Hardware
When it comes to making your own curtains, it’s essential to choose the right fabric and hardware to ensure a professional-looking finish. The fabric you select will not only determine the aesthetic appeal of your curtains but also their functionality and durability.
Fabric:
- Consider the style of your room and the amount of natural light you want to let in.
- Opt for fabrics like linen or cotton for a more casual look, or velvet and silk for a more formal touch.
- Make sure the fabric is easy to work with and can hold its shape when hung.
Hardware:
- Choose curtain rods and finials that complement the style of your curtains and the overall decor of your room.
- Consider the weight of your curtains when selecting brackets and screws to ensure they can support the fabric without sagging.
- Don’t forget to measure the length of your window and add extra length to accommodate for the hem and rod pocket.
In summary, taking the time to carefully select the right fabric and hardware for your curtains will result in a finished product that not only enhances the beauty of your space but also reflects your personal style and attention to detail.
Precision Measuring and Cutting Techniques
To start making your own curtains, the first step is to carefully measure the windows where the curtains will hang. Use a metal tape measure for precise measurements. Measure the width of the window and the desired length of the curtains. Remember to account for any extra fabric needed for hems and seams.
Once you have your measurements, it’s time to cut the fabric to the correct size. Use fabric scissors to ensure clean, straight lines. Double-check your measurements before cutting to avoid any mistakes. If you are using a patterned fabric, make sure the pattern aligns properly when cutting multiple panels.
After cutting the fabric, it’s time to sew the panels together. Use a sewing machine for faster, more professional-looking results. Sew a straight stitch along the sides of the panels to create neat seams. For a more decorative touch, consider adding trim or tassels to the edges of the curtains.
Finally, hang your newly made curtains using curtain rod brackets. Make sure the curtains are even and level before securing them in place. Step back and admire your handiwork – you’ve successfully created custom curtains for your home!
Sewing and Assembling Your Curtains
In order to make your own curtains, you will need to follow a few simple steps to sew and assemble them. First, choose the fabric that you want to use for your curtains. Make sure to measure the length and width of your windows so that you can cut the fabric to the correct size.
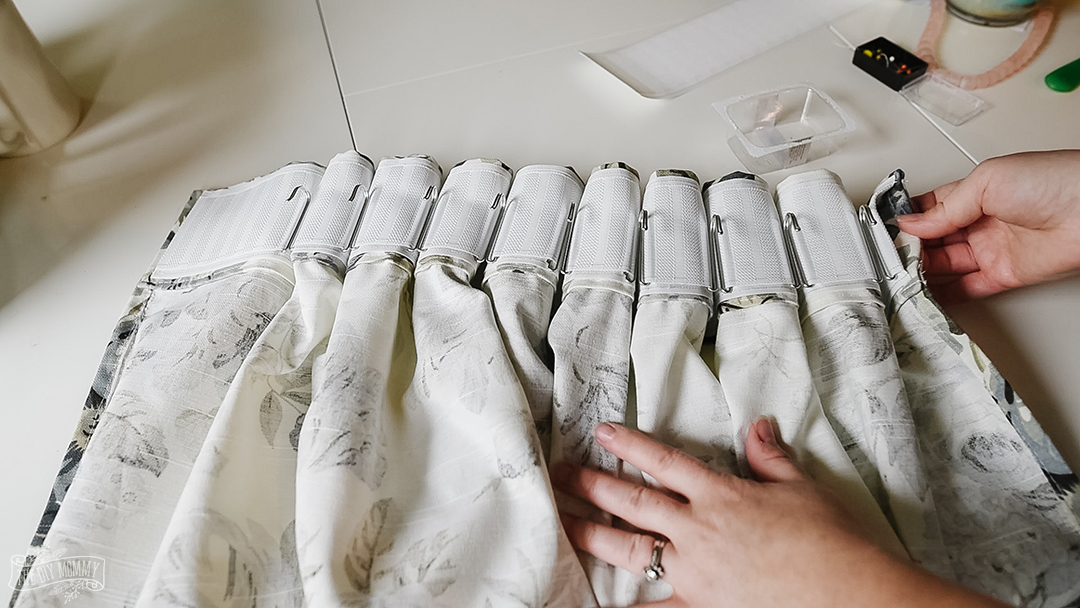
Next, hem the edges of the fabric using a sewing machine or by hand to prevent fraying. You can also add lining to your curtains for a more polished look and to help block out light. Once the hems are done, it’s time to gather the fabric and create the pleats or gathers for your curtains.
After the fabric is gathered, you can attach the curtain rod pocket at the top. This is where you will insert the curtain rod to hang your curtains. Finally, hang your beautiful homemade curtains and enjoy the cozy atmosphere they bring to your home. With a little time and effort, you can create custom curtains that perfectly match your personal style and decor.
Adding the Final Touches and Installation Tips
Once you have finished sewing your curtains, it’s time to add the final touches to make them truly special. One way to elevate the look of your curtains is by adding decorative trims along the edges. You can choose from a variety of trims such as tassels, pom-poms, or fringe to complement your fabric choice.
Another way to enhance your curtains is by attaching curtain rings or grommets to make them easy to open and close. Curtain rings can be sewn directly onto the fabric, while grommets require a bit more effort but give a modern and streamlined look. Be sure to space the rings or grommets evenly for a polished finish.
When it comes to installing your curtains, make sure to measure the width of your window accurately to ensure a proper fit. If you’re hanging your curtains on a rod, consider adding curtain rod brackets for extra support. Hang your curtains at the correct height – typically about 6 inches above the window frame – to create an illusion of height and make your room appear larger. Finally, steam or iron your curtains to remove any wrinkles and enjoy the finished look in your space. In conclusion, creating your own curtains is a rewarding and fulfilling DIY project that allows you to personalize your space and showcase your creativity. By following the step-by-step tutorial outlined in this article, you can embark on a journey of designing and crafting beautiful curtains that perfectly complement your home décor. So gather your materials, unleash your inner designer, and let your imagination run wild as you embark on the adventure of making your own curtains. Happy crafting!
